

Home Crafting with Vegetable Dyes
![]()
There are many online tutorials and advice on making natural dyes (we highly recommend Botanical Inks) and in general they follow the same process, but we tried some techniques of our own (sometimes a little experimental!) as we were primarily focused on the fun of creating rather than achieving the perfect outcome. Read below to see how we got on!

Choosing your Dyes
There is a whole world of fruits, veg, herbs and spices (and even garden weeds!) that can make amazingly wonderful & colourful dyes. To name a few, here’s our rough colour guide:
- Pinks, red, purples – Red cabbage, beetroot, avocado skins & pips, cherries & berries (although we’d personally much rather eat these!)
- Yellows, browns, ochre & orange – turmeric, brown onion skins, carrots & Orange peels
- Blues – Red cabbage mixed with baking soda, black beans
- Greens – Carrot tops, nettles, spinach & you can always mix your yellow and blue dyes.
![]()
We chose veg and spices already had in the house to avoid any unnecessary trips to the shops as below;
Avacado skins & pips – we collected around 6 medium avocados over a couple of weeks - after eating, wash the inside of the skin to remove any excess green flesh (otherwise this can make the dye brown) and wash the pip, these can then be air dried or stored in the freezer. We chose to freeze them as this seemed to have the most positive result according to many google searches! Avocado skins are best for stronger pink the more purple looking the skin is – the colour can be a big challenge to achieve from avocados, and there is a LOT of tutorials for this online.
Turmeric - Although you are ‘meant’ to go for fresh turmeric, we settled for using the ready ground spice as it was what we had, and it certainly seems to dye well regardless!
Beetroot – We used 1 large whole raw beetroot chopped up, with the skin still on
Red Cabbage – ½ a large red cabbage well chopped a and well separated to ensure maximum colour came off every slice.

Preparing the dye bath
We used roughly one chopped cup (at least) of each item with twice as much water as the fruit or vegetable to aim for the most saturated dye possible. Cover and place on a medium heat, bringing to a simmer for one hour, stirring once or twice during this time. The biggest exception we made for these measurements was the turmeric, which in our incredibly technical approach, we just eyeballed until the colour looked nice!
Once ready, run your dye through a sieve and return the liquid back in to your pan (or jar) ready for your chosen fabric or item.
![]()
Choosing & Preparing your fabric
Any natural fabric can be dyed, with the most obvious choice being a white or natural colour as your starting point, although it could be fun to attempt over dying on prints, which we may well try next. We chose 4 white cotton napkins, an old t-shirt (that was looking a little off-white!), some cotton East garment bags and an old white pillow case that was on its way to fabric recycle, tearing this in to strips to make dyed ribbons and for testing colours throughout the process.
To ensure a long-term take of the colour you will need to prepare your base in a fixative (or mordant as the pros call it!) which varies based on your dye.
For berry based dyes use ½ cup salt to 8 cups of water and for all other veg or plant dyes 1 cup of vinegar to 4 cups of water.
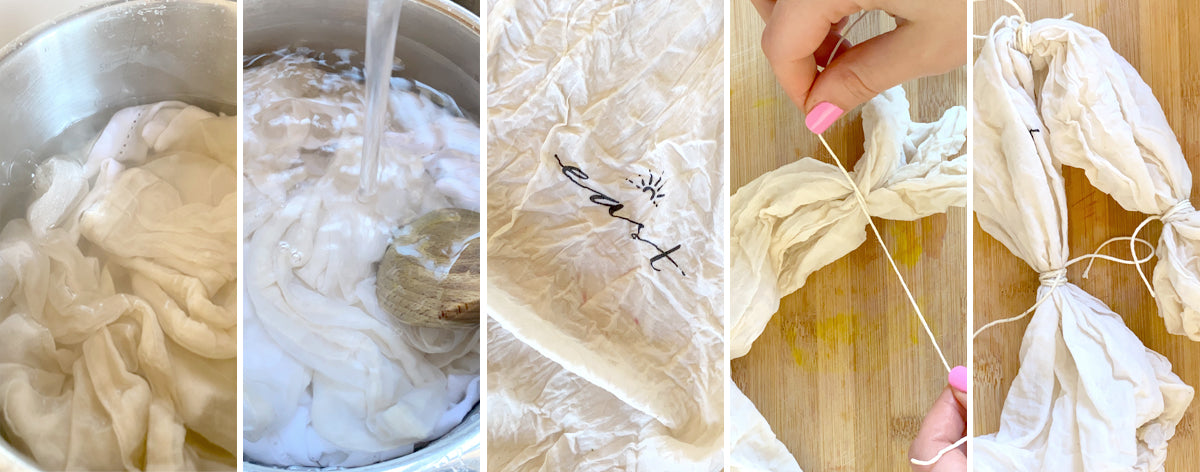
Soak your fabric in the mixture for approximately an hour simmering at a low boil, giving it a thorough rinse once ready. Squeeze out the excess liquid and while still damp, you are ready to add to your pot of dye.
We attempted some tie-dye on our fabrics using cotton string we had in the house, although elastic bands make be the more successful choice if you have them available. We tied these after being in the mordant solution, however we have since read tips that you can do this before soaking!
![]()
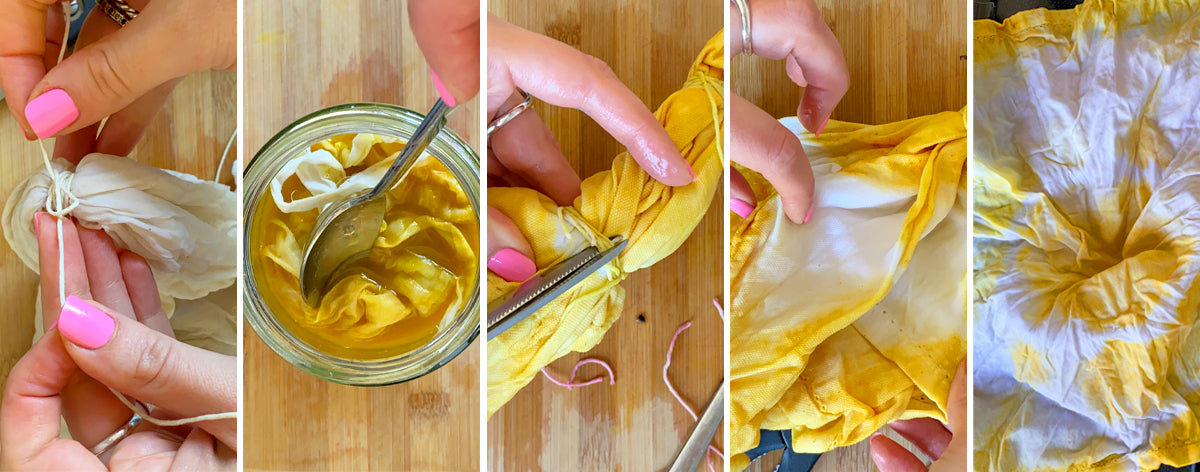
Dyeing your fabric
Place the damp fabric in to your pan of dye and simmer until you are happy with the colour, do be aware the colour drastically lightens once rinsed and dried, apparently almost black in appearance donates a strong colour, however we wanted to go for softer tones so removed the fabrics way before this.
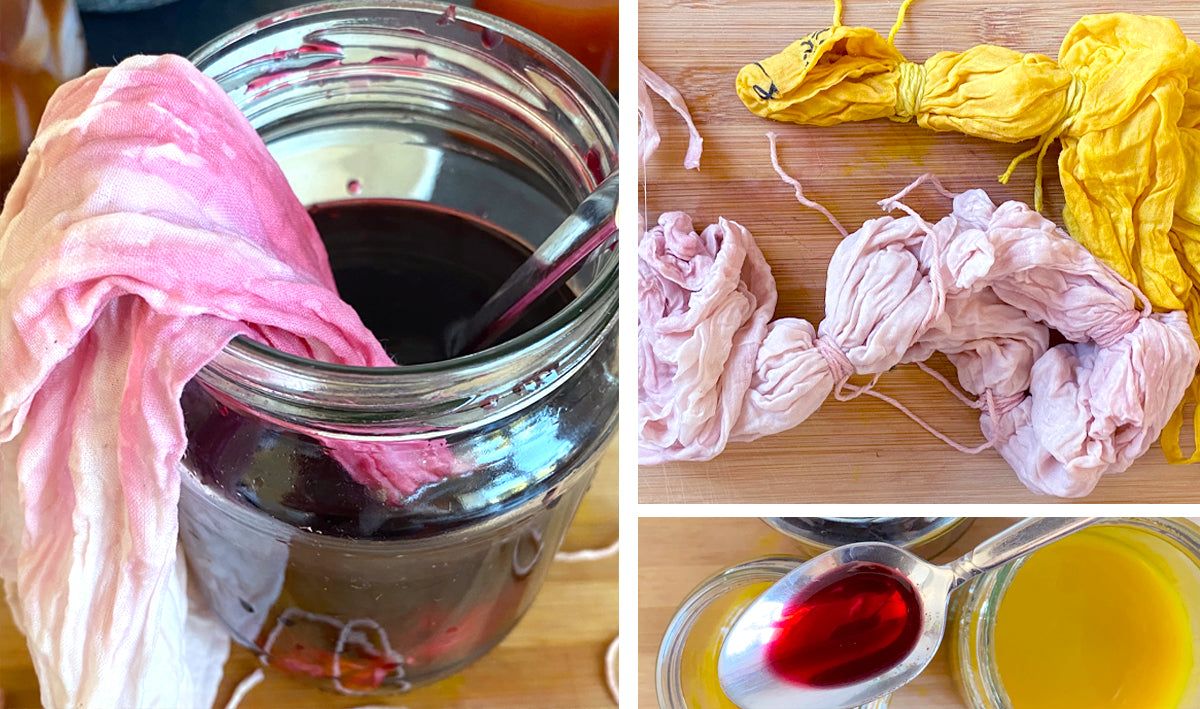
For the turmeric and some of the smaller items we skipped the boiling of the fabric in the dye and dipped the cotton straight into a jar of cooling dye – again we were a little experimental and went for fun over perfection.
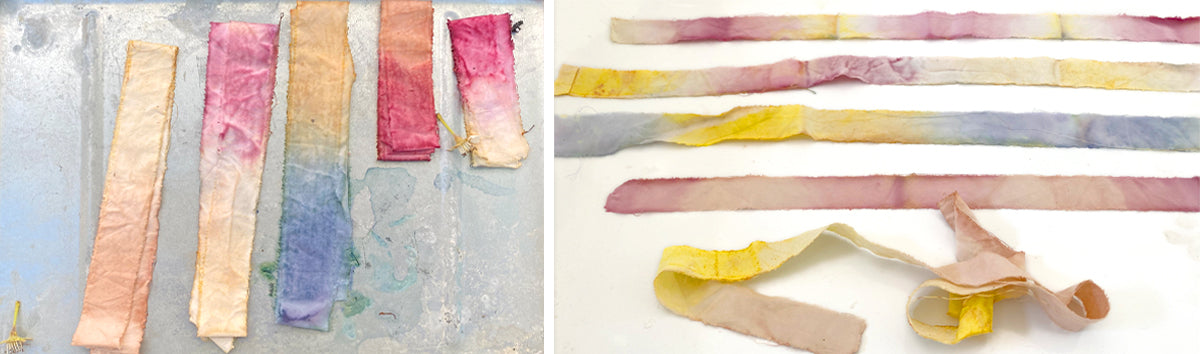
For some fabrics, we did this process a couple of times, dying with one colour, rinsing and dipping in to another colour to get some ombre effects. For the ‘ribbons’ we folded up the strips and dipped one end in a colour and the opposite in another, leaving this to dry out before rinsing to really soak up the colours. These items were the most fun to see what you can achieve with the mixing of colours.
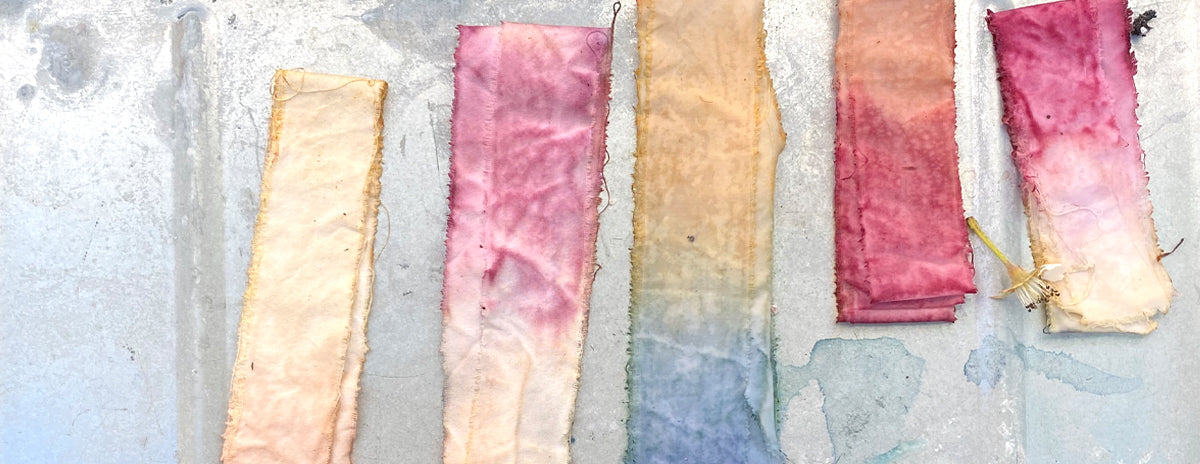
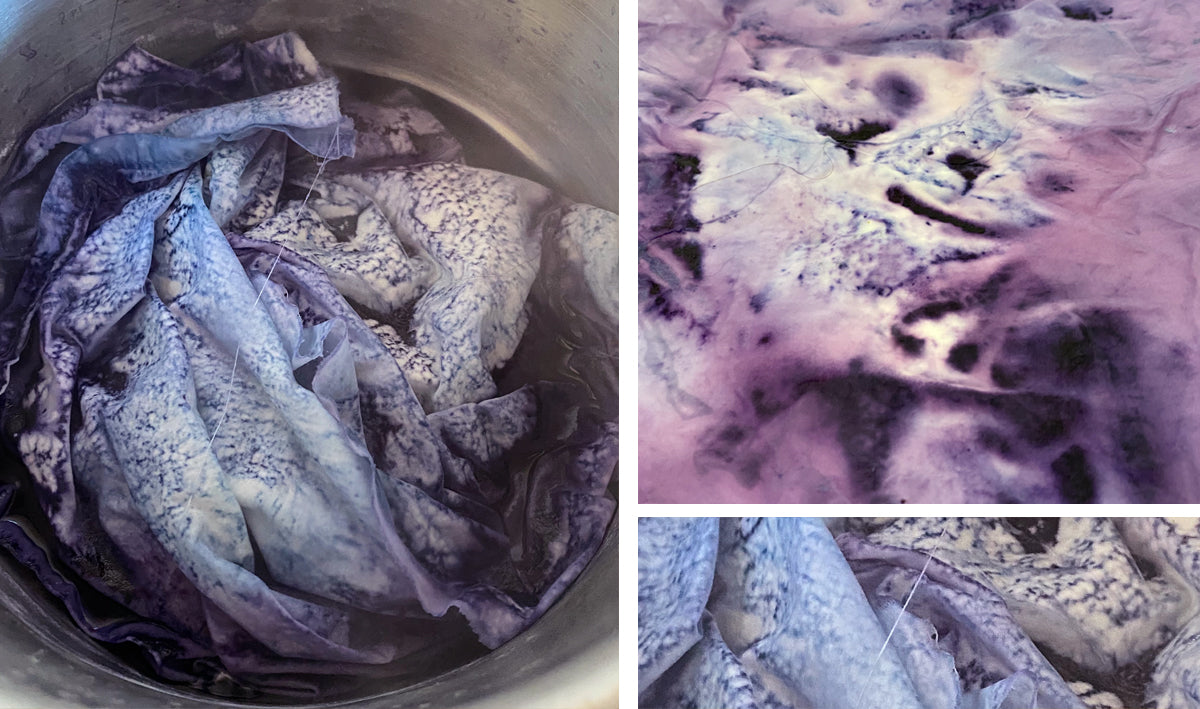
We also experimented with a shallow dye bath so the fabric was only partially covered and love the effect this achieved through the patchiness of colour and textures, as pictured below.
Drying your fabrics
Once your fabrics have been rinsed, it is best to allow them to dry naturally and out of direct sunlight to avoid fading. We did however choose to completely avoid this advice and dried ours in the sun as we wanted super soft & subtle colours on the napkins and ribbons.
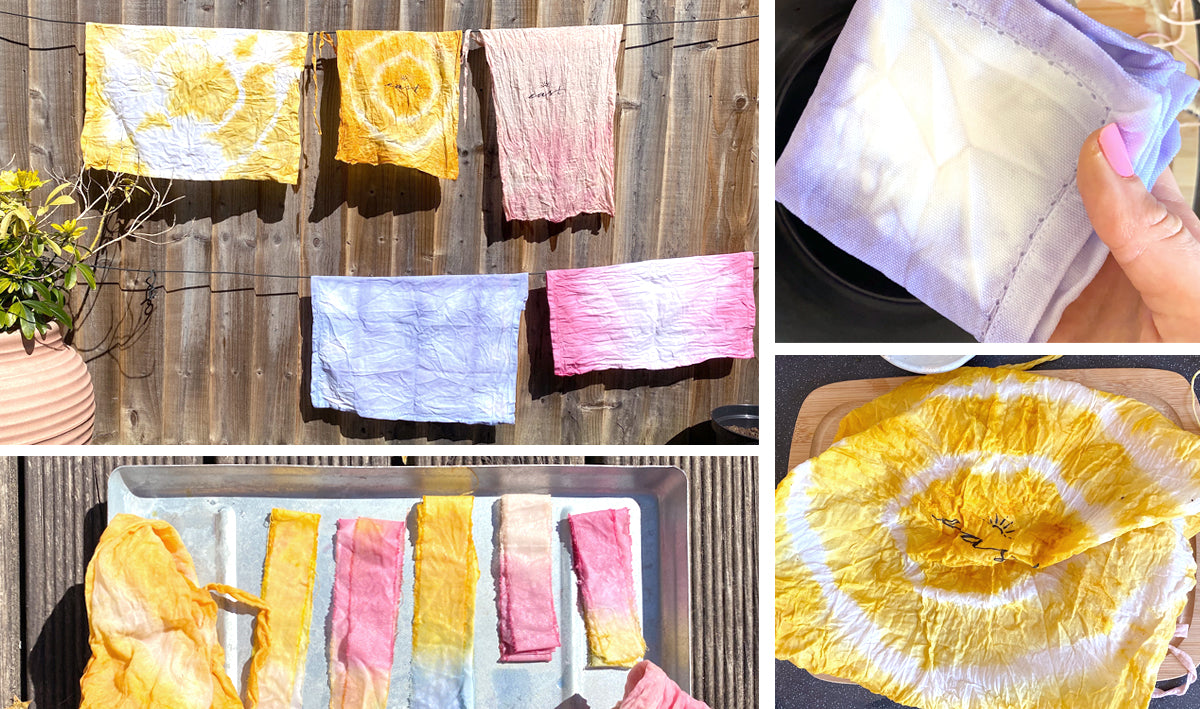
You can see how much colour fades through drying on the strips of cotton before (above) and after (below).
The finished results
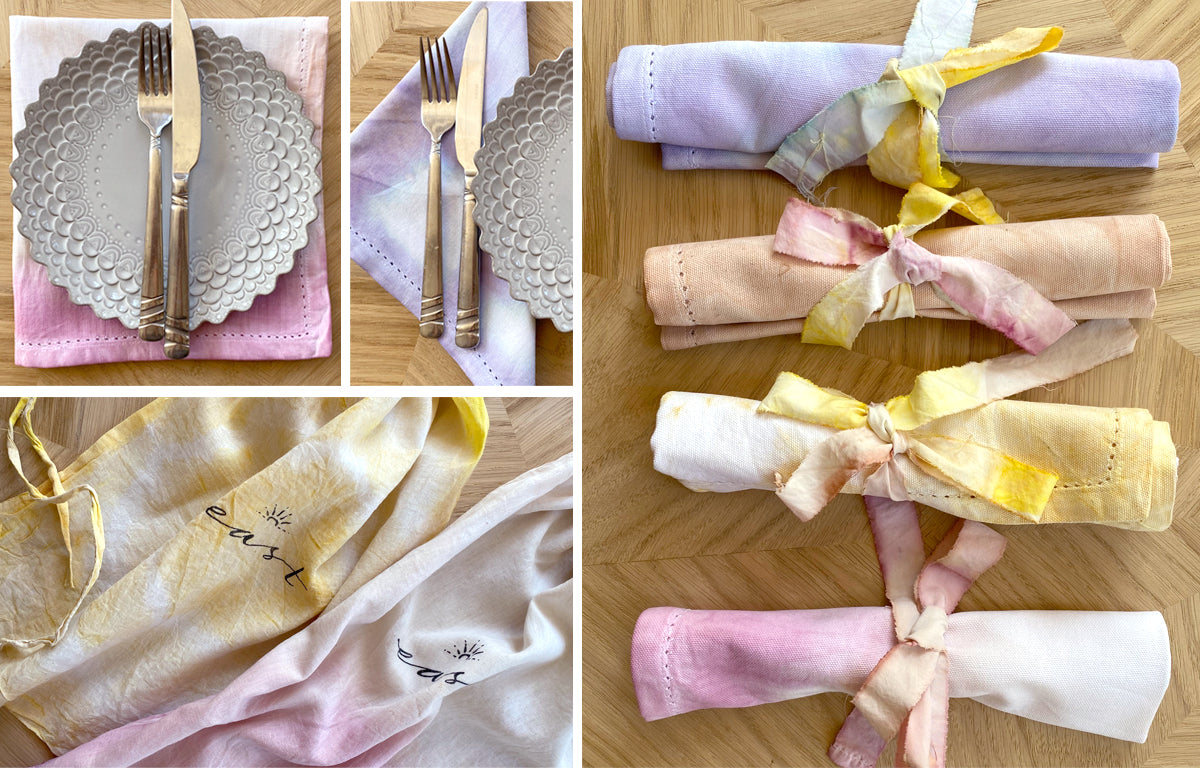

If you are looking for perfect dye and coverage and the longest lasting colour possible - we do recommend you do a little research in addition to our guide as ours was mainly aimed at experimenting and getting creative.
We would love to hear from you how you get on, and most of all, have fun!
![]()
%20and%20in%20general%20they%20follow%20the%20same%20process,%20but%20we%20tried%20some%20techniques%20of%20our%20own%20(sometim...)
4 comments
I loved this. I use natural colours for my soap, but keep meaning to try fabric.
Suzanne Jones
I still have necklaces made when I was young (60+ years ago) with melon pips dyed in onion skins. When my 10 yr old granddaughter saw them, she loved them, so I made 2 more – one dyed from onion skins and the other with Butternut squash seeds dyed with red onion skins! I’ve also made a necklace from date stones drilled with my jewellery drill ( I did silversmithing for a while) and threaded onto a thin leather thong. There’s an attractive necklace I bought years ago which is made of randomly shaped pieces of almond shells, painted in different bright colours which has also been admired.
Judith MACBETH
Love this , thankyou 🦋
Colette Hull
That was such a great piece to read. Really inspirational. I can’t wait to eat 6 avocados.
Jackie Mortimer
Leave a comment
This site is protected by hCaptcha and the hCaptcha Privacy Policy and Terms of Service apply.